
Azure AD Connect?
Azure AD Connect is a tool that links on-premises identity infrastructure to Microsoft Azure AD, incorporating features that were previously available in Dirsync and AAD Sync.
Download Azure AD Connect
Download Microsoft Azure Active Directory Connect for free from the Microsoft Download Center.
Azure AD Connect requirements
The minimum requirements are:
Hardware
- 1.6 GHz CPU
- 4 GB Memory
- 70 GB Hard drive size
Server
- .NET Framework 4.6.2 or later
- Domain-joined Windows Server 2016 or later
- Windows Server full GUI
- Windows Server Core isn’t supported
Install and configure Azure AD Connect
Installing Azure AD Connect on a domain controller is supported, but Microsoft recommends installing it on a separate domain-joined Windows Server instead.
- After you download Azure AD Connect, launch the setup, agree to the license terms, and click Continue.

- Click "Customize" for a custom installation, where you can choose all the options yourself.

- Click "Install" to begin installing the Azure AD Connect synchronization service.

- Choose "Password Hash Synchronization" and then click "Next"

- Enter the Azure AD global administrator credentials, then click "Next".

- Click on Add Directory.
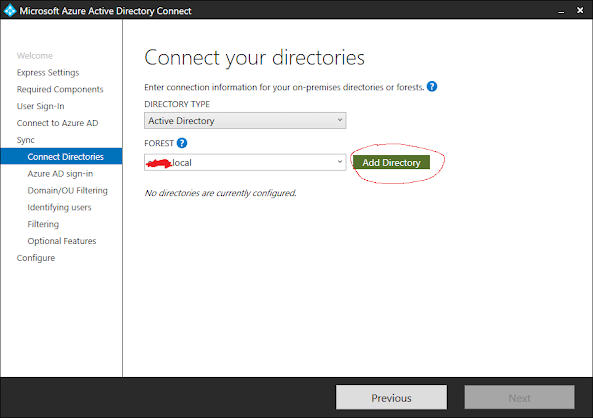
- Select "Create new AD account" fill in the administrator account with Enterprise Admin rights and click "OK" Azure AD Connect will generate an AD DS Connector account in AD with the required permissions.
 Note: Alternatively, you can select "Use existing AD account" and enter the credentials of the AD account you created.
 - Active Directory is added. Click Next.

- Select Continue without matching all UPN suffixes to verified domains. Click Next.

- You can sync all domains and OUs. Click Next. But now we will only sync the specific OU and sub-OUs.

- Choose how users will be identified in your on-premises directories and in Azure AD. Then click Next.

- Choose Synchronize all users and devices. Click Next.

- You can start by enabling password writeback. Once that's done, proceed to enable Self-Service Password Reset in Microsoft Entra ID. If needed, you can complete the second step at a later time.

- Select Start the synchronization process when configuration completes. Click Install.

- Azure AD Connect configuration completed. Click Exit.


Conclusion
You have learned how to install and configure Azure AD Connect. Before starting, ensure you meet all the prerequisites for installation. Once installed, Azure AD Connect will automatically synchronize every 30 minutes. You can verify the synced on-premises AD users in the Microsoft 365 admin center. Remember to upgrade Azure AD Connect whenever a new release is available.
Did you like this article? You might also be interested in learning
Upgrade Microsoft Entra Connect Sync version. Remember to follow us and share this article!